React Native push notifications with Firebase
Author
Maja Matijević
Date
Category
Development
Push notifications are more and more frequently used in today’s mobile applications, considering they are an efficient way to stimulate user engagement and help them keep up with the latest news inside the application.
A push notification is essentially a message which is displayed to the user outside of the application in the form of a pop-up, in the same manner as SMS text messages. Push notifications can be used for various types of actions occurring inside the application, such as important news and updates or simply as a type of reminder to the users, for example about a great offer or a certain event taking place. Push notifications are supported on every mobile platform.
To begin implementing push notifications we need to set up Firebase Cloud Messaging (FCM). Firebase is perfect for this because it is one of the easiest ways of implementing push notifications, considering it provides a variety of options and extensive documentation.
Registering the app
To use the FCM, we must create a new Firebase project or use an existing one. Creating a new Firebase project is done by navigating to the Firebase Console.
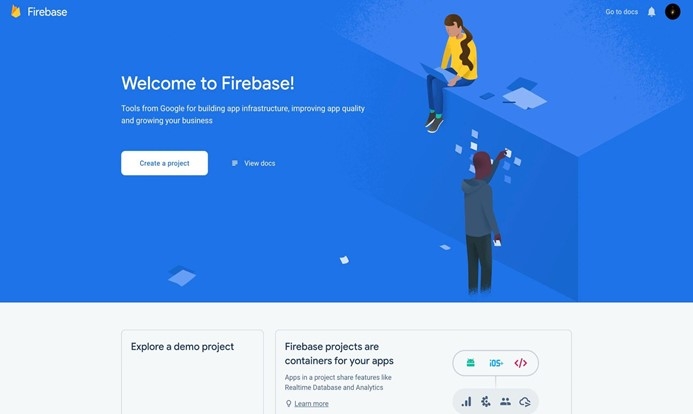
Creating a new project is quite simple. The only things required are a project name and accepting the terms and conditions. There is also an option for setting up Google Analytics, which is not mandatory. After creating a new project or navigating to an already existing one, the next step is to register a new app to the Firebase console. Adding the app is the essential step for ultimately being able to connect Firebase to our React Native app.
Registering a new Android app
Registering a new iOS app
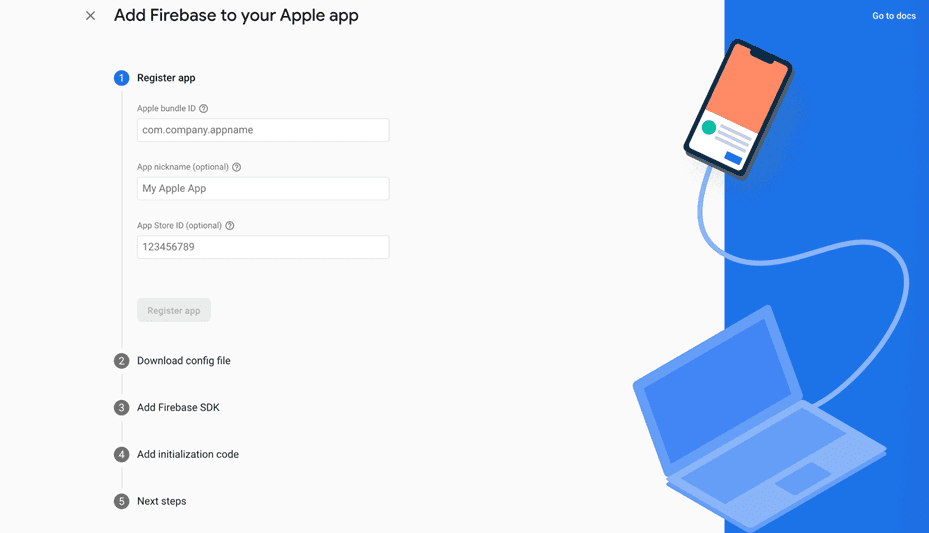
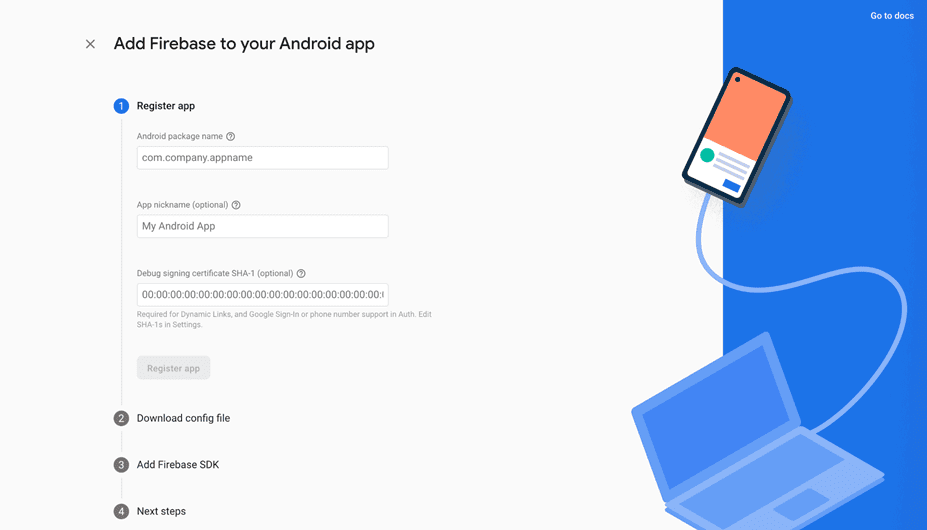
Since React Native supports both Android and iOS, we are going to add both apps to the Firebase console. In adding an Android application, we must enter our app’s Android package name which can be found in android/app/build.gradle of the React Native project. Similar to that, when adding an app for iOS in Firebase, we are required to enter the Apple bundle ID. The bundle ID can be found as part of the "General" tab in our project in Xcode.
After entering the necessary information for registering our app, a config file will be generated both for Android and iOS. They can be downloaded immediately after registering the app or later in the project settings.
React Native Firebase
To connect our React Native app to the apps created in the Firebase console, a couple of steps are required. Let’s say we already have our React Native app created. All that we’re missing now are the libraries which we’ll use to implement push notifications. The first thing to do is to add the required Firebase libraries to the project:
yarn add @react-native-firebase/app
yarn add @react-native-firebase/messaging
cd ios && pod install
Once the Firebase libraries have been added, we need to do a bit more setup to be able to successfully receive push notifications on both Android and iOS devices.
Android setup
To enable push notifications on Android, we have to download the config file google-services.json generated by Firebase previously and place it in the android/app/ folder.
Furthermore, the google-services plugin has to be enabled. To do so, we’re going to add the google-services plugin dependency inside of android/build.gradle
buildscript {
    dependencies {
        // ... other dependencies
        classpath 'com.google.gms:google-services:4.3.10' // ADD THIS
    }
}
To execute the plugin you need to add the following to android/app/build.gradle:
apply plugin: 'com.android.application'
apply plugin: 'com.google.gms.google-services' // ADD THIS
iOS setup
For setting up push notifications on iOS, we need to add the config file to the project as well. That is done by downloading the GoogleService-Info.plist file from our iOS Firebase project, adding it to the ios folder of the project and dragging it to our main project directory in Xcode, selecting all wanted targets when prompted.
To allow Firebase to use these credentials, we need to add a few lines in our ios/{projectname}/appDelegate.m file. Firstly, we need to add a line to the top of the file to import Firebase SDK:
#import <Firebase.h>
After that, we add the following inside the existing didFinishLaunchingWithOptions method:
- (BOOL)application:(UIApplication *)application didFinishLaunchingWithOptions:(NSDictionary *)launchOptions {
    [FIRApp configure]; // ADD THIS
    // ...
}
One more necessary step to enable push notifications for the iOS project is to go to the project in Xcode, pick Signing and Capabilities under project settings and add Push Notifications as well as Background Modes with boxes checked as shown below.
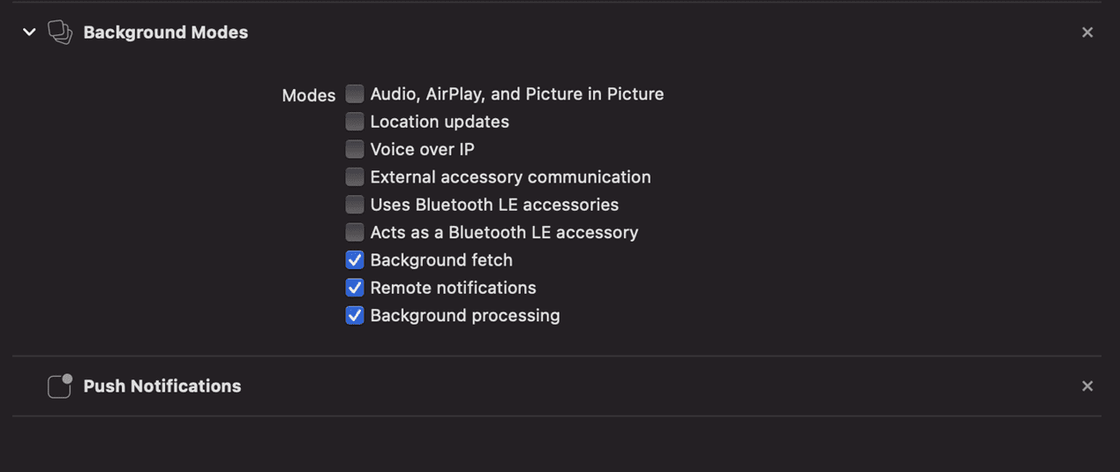
Besides all that, we need to generate an APNS certificate to receive push notifications on iOS devices. APNS or Apple Push Notification Service is a platform service which enables third-party app developers to send push notifications to iOS users. In order to generate certificates we must have a paid Apple Developer account. After following all the required steps to generate a certificate, we have to go back to our Firebase project and add the certificate in the project settings for iOS cloud messaging.
Once all the previously mentioned steps are done, we’ve successfully enabled push notifications for iOS and can begin to write React Native code to see them in action.
Receiving messages from Firebase
After setting up everything required for push notifications to work on both platforms, what’s left is to write our React Native code for receiving messages from Firebase, which will later be shown as notifications.
For the purpose of this blog post, we’ll be sending the messages directly from the Firebase console. It allows us to choose the title and text of the notification, as well as a custom image, scheduling for a later date and other useful features.
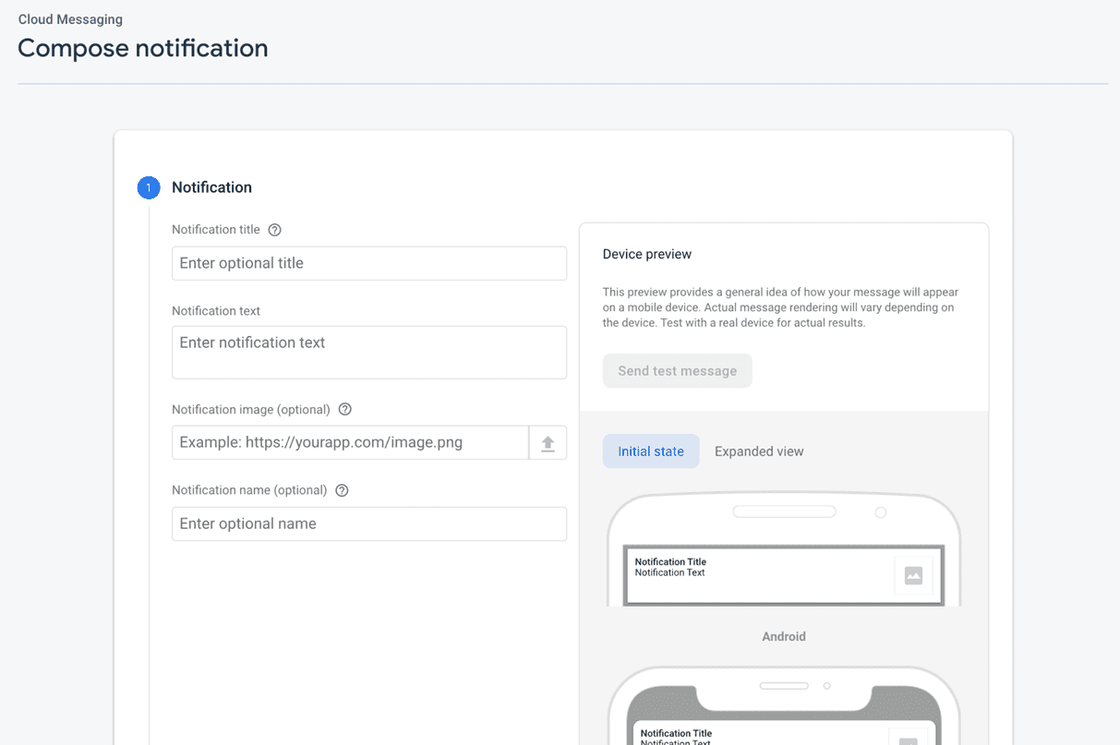
Before we send or receive any messages, we need to be aware of the fact that iOS prevents notifications from being displayed unless you have received explicit permission from the user. Thus, we need to ask the user for permission, which we’ll do using the previously installed library.
import messaging from '@react-native-firebase/messaging';

const requestUserPermission = React.useCallback(async() => {
    await messaging().requestPermission().then((status: FirebaseMessagingTypes.AuthorizationStatus) => {
        const enabled =
            status === messaging.AuthorizationStatus.AUTHORIZED ||
            status === messaging.AuthorizationStatus.PROVISIONAL;
        if (enabled) {
            console.log('Authorization status is', status);
        }
    }
},[])
In the example we have a function that calls the requestPermission method and logs the result. If this method is called, the user will be asked for notification permission upon entering the app for the first time. When calling this method, it is good to check whether the platform is iOS considering the fact that Android devices do not require explicit permission for receiving notifications.
Once all devices have permission, we must subscribe to receiving notifications. React Native Firebase provides two methods for subscribing to the messages: one handles messages when the application is in the foreground and the other when the application is in a killed state or in the background.
Foreground messages
The onMessage method is used for handling messages in the foreground.
import React from 'react';
import messaging from '@react-native-firebase/messaging';

function App() {
    React.useEffect(() => {
        const unsubscribe = messaging().onMessage(async (remoteMessage) => {
            // do something with the message
        });

        return unsubscribe;
    }, []);
}
The remoteMessage contains all the information about the message. The data property inside the remoteMessage can include any custom data we need to send, which can prove pretty useful if we want to navigate to a certain page when the notification is clicked. You can check out all the properties which can be received inside the remoteMessage here.
Background messages
When the application is in the background or killed, the onMessage method doesn’t get called. For that reason, if we want our notifications to be displayed when the app is not in the foreground, we need to call the setBackgroundMessageHandler method. It’s advisable to call this method as early in the app logic as possible.
import { AppRegistry } from 'react-native';
import App from './App';
import messaging from '@react-native-firebase/messaging';

messaging().setBackgroundMessageHandler(async (remoteMessage) => {
    console.log('Message received in the background!', remoteMessage);
});

AppRegistry.registerComponent('app', () => App);
Now that we’ve covered both foreground and background state messages, we still need a way of actually displaying them as notifications.
Displaying the push notification
To display a received message as a push notification, we need another library which is going to help us with displaying and managing the notifications. For that purpose we’ll be using the Notifee library.
yarn add @notifee/react-native
Notifee provides us with a variety of methods for handling the received messages, such as displaying a notification, setting up foreground and background event listeners (e.g. when the user clicks on the notification) as well as creating notification channels.
The first and most important method we’ll mention is the displayNotification method. It allows us to display the notification and provides various options for doing so, such as setting the title and the body of the notification, customizing the notification for Android and iOS in terms of appearance and behaviour (e.g. setting a custom notification sound or icon) and passing custom data which can later be used in foreground or background events.
notifee.displayNotification({
    title: 'Message title',
    body: `Message body with ${some_data}`,
    android: {
        channelId: 'yourChannelId',
        sound: 'default',
        smallIcon: 'ic_push_notification',
        pressAction: {
            id: 'default',
        },
    },
    ios: {
        sound: 'customSound.wav'
    }
});
There are many other options which we’ve not shown in this example, but you can check out Android concepts and iOS concepts provided by Notifee for more information about the possible options.
As you can see, channelId is one of the options we named for Android. It was not mandatory to use a channel before, but after Android API level 26, it is required and the notifications will not work without it. Therefore we need to create a channel before we can display the notification on Android.
const channelId = await notifee.createChannel({
    id: 'default',
    name: 'Default Channel',
});
We can create the channel at the very start of our app if we know its name.
Now, after calling the displayNotification method, we’ll be able to see our message in the form of a push notification both on Android and iOS.

Interaction
Now that we’ve managed to display a notification, it would also be nice to add some events, perhaps making the app open or take us to a certain page inside the app when we click the notification. While iOS opens the app on notification click, Android doesn’t. The easiest way to make the app open on Android is using the pressAction property in the displayNotification method. It is also possible to open a custom component from the notification, about which you can find out more in the Notifee documentation.
Lastly, if we wanted to open a certain page to which we can only navigate with a specific ID, we could use onForegroundEvent and/or onBackgroundEvent methods, which are Notifee APIs for handling events when the application is either in background or foreground state.
notifee.onBackgroundEvent(async ({ type, detail }) => {
    if (type === EventType.PRESS) {
        console.log('User pressed the notification.', detail.notification.data.someId);
    }
});
These events provide us with the notification information, which means if we send the notification with some custom data, we can collect it here and perhaps navigate the user to a certain page using an ID or use the information for something else.
Recap
Sending and receiving push notifications in React Native and Firebase requires quite a bit of setup, although most of it is pretty straightforward. The result leaves us with an awesome way of managing push notifications with various options and ways to manipulate them in the way we want to. If you wish, you can read more about Firebase Cloud Messaging, Notifee and React Native Firebase to get more familiar with the way they work and perhaps try implementing this amazing feature in your future project(s).