Automated testing using Selenium
Author
Katarina Draganjac
Date
Category
Development
Testing ensures code quality and functionality which makes it an essential part of the development process. Usually, testing is done manually, but in some cases, e.g. when repetitive testing is necessary, testing can be automated. In one of the previous blogs, the topic of automating mobile tests using Appium was covered, while in this blog the topic of automated testing using Selenium will be covered.
Selenium is a set of tools for automating web browsers.
Primarily, it is used for frontend testing, i.e. for automating web applications for testing purposes.
Selenium allows users to simulate usual activities performed by users.
For example, entering text into fields, selecting drop-down values, clicking links etc.
It provides many controls such as mouse movement, JS execution and similar.
You can choose between different tools - Grid
, IDE
or WebDriver.
Selenium Grid allows you to run test cases in different machines across different platforms.
IDE is a browser extension that you use to develop your Selenium test cases in an easy way.
Last but not least, WebDriver is used for website test automation by importing it to your project and writing tests by yourself.
In the following sections, we will go through the process of creating a simple automated test using Selenium IDE and Selenium WebDriver.
Selenium IDE
Integrated Development Environment is an open source record and playback test automation. It doesn't require any additional setup other than installing the extension on your browser. For Chrome, it can be found on Chrome Web Store. After adding the extension to the browser, you can find it at top of the browser window (under Extensions). When you click on it, IDE will open. To create a new test click "Record a new test in a new project".
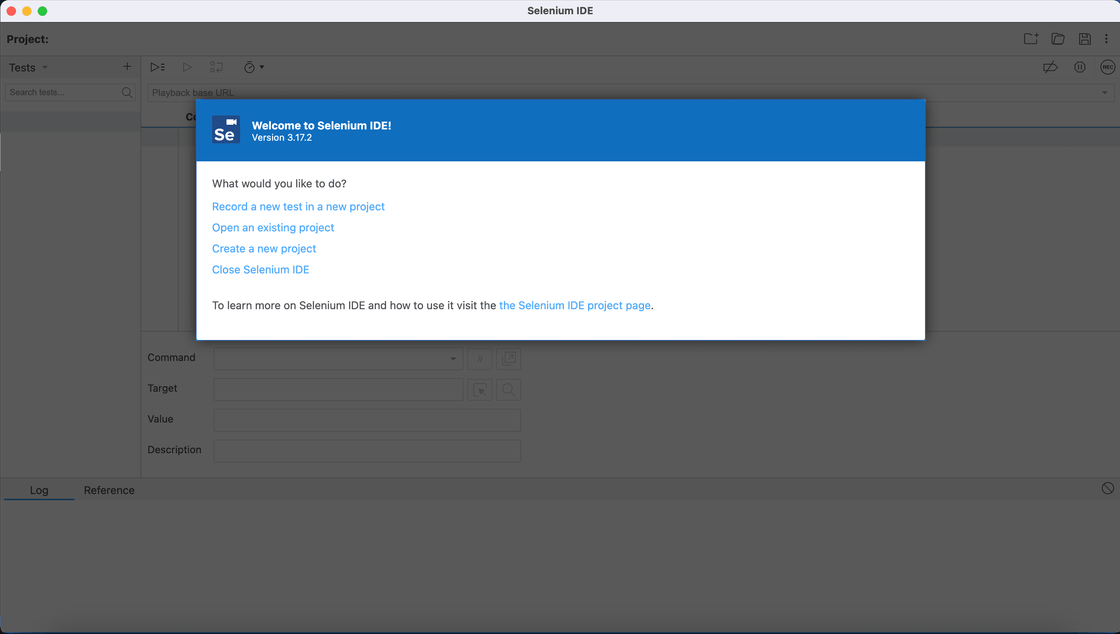
After you provide a name for the new project, you will have to enter a valid base URL because your tests will start by navigating to this URL. Right away, Selenium IDE will open that URL in the browser and start recording your actions. Every click, every input will be recorded. When you're done, go back to IDE and click "Stop recording". After giving a name to this test you will be able to see the list of all actions.
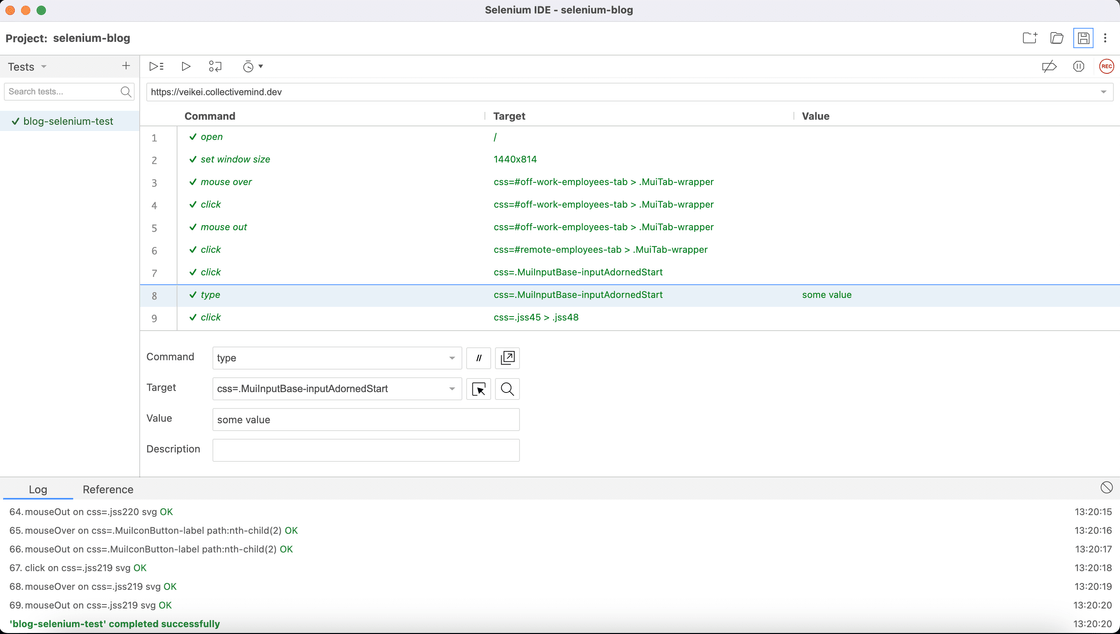
Now, you can click on each action and see its command, target and value (if the command is type).
You can also change something if needed. If you click on "Run current test",
IDE will replay the whole test, i.e. repeat all the actions.
If everything completes successfully, commands will turn green.
As you can see, with IDE you can create automated tests with no programming skills required.
Of course, if you do have some programming skills, IDE allows you to add conditional logic and looping to your tests.
Another useful option is that you can also export these actions in a preferred language.
Selenium WebDriver
WebDriver allows you to write your own tests in a preferred programming language. These tests are stored in your project and are run from the terminal. WebDriver is an API and protocol that defines an interface for controlling the behavior of web browsers. Each browser is backed by a specific WebDriver implementation - a driver. The driver is the component that handles communication to and from Selenium and the browser. The Selenium framework ties all of these pieces together through an interface.
Before you can start writing Selenium code, you have to install required libraries and the driver for the browser you want to use. Detailed explanation is available on Selenium official website. Chrome drivers can be downloaded from ChromeDriver. After setting up Selenium in your project, you can write the first test.
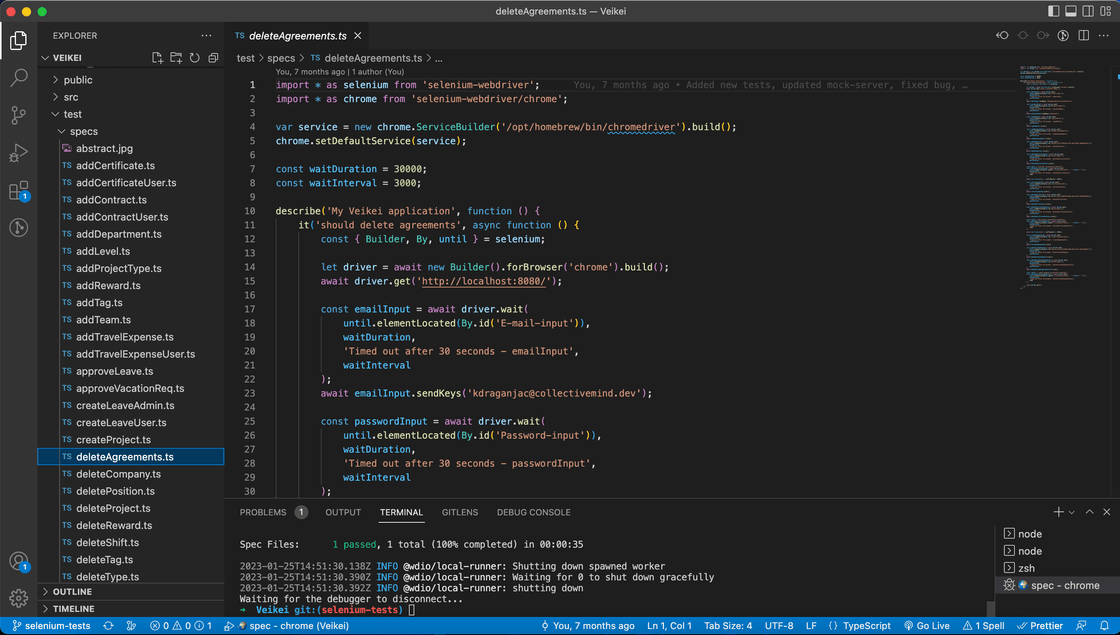
In the photo above, you can see an example of a simple test.
The tests are located in a folder called test.
In this case, typescript (.ts) is used.
The test starts with a couple of things that are required for every test.
So, on the first four lines, the location of webdriver is added.
The actual test starts with keywords describe and it.
After you initialize the driver, you can locate elements on the website by using: await driver.wait(until.elmentLocated(by.id()).
Instead of id, you can use name or some other common locator.
Locators have to be added in the code for each element.
Now that you located the element, you can either use sendKeys() for input or click().
These are the most used methods.
An example of checking if a specific text is displayed on the page by using xpath locator is:
await driver.wait(until.elementLocated(By.xpath("//*[cointains(text(), '" + text + "')]"));
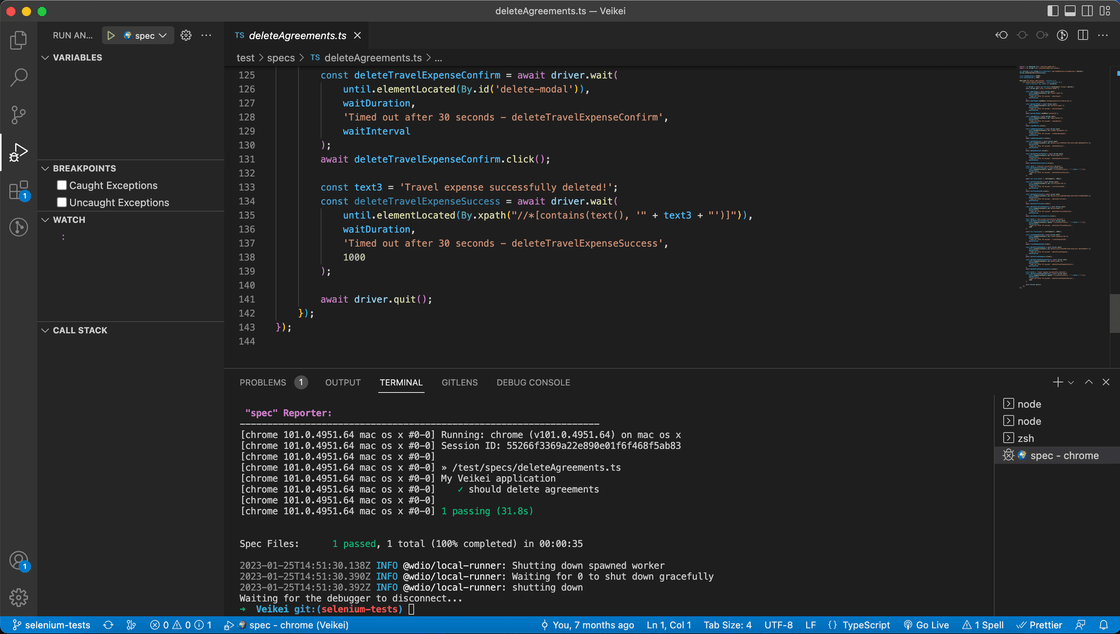
When you're done, you can go to "Run and debug" option in the sidebar (if you're also using VS Code). From there, you can run the test and the result will be displayed in the terminal. Of course, with more programming skills and Selenium knowledge, there are more possibilities that can be added in a test depending on the features that you want to test on the website.
Conclusion
Selenium is one of the most used tools for automated tests because it provides several options to suit your needs. A big advantage is that is free as well as easy to use. IDE is an option if you need simple tests that can be created without much programming skills. Also, if you don't have time for an extensive setup. WebDriver is a more complex option but ideal for thorough testing. It offers many possibilities that you can use with some programming skills. Also, it enables you to use mock server so that you don't have to use real data every time a test is run.